

Do you still remember your first time?
All that panic-stricken wondering whether you were doing it right…
Whether it was firm enough yet…
Whether it had gone on long enough or not…
Whether it was really supposed to look like that…
Whether the equipment was in deep enough…
I remember my first time very well – but then I would, because it only happened over the summer.
I am, of course, talking about my first attempt at making jam.
Well, what did you think I was talking about?!
As I’ve mentioned before, we were thrilled to discover back in the summer that our neighbours have a huge cherry plum (or mirabelle) tree in their garden, and that a substantial number of the plums fall directly into our garden. I have already blogged the mirabelle and coconut muffins that I have made, and I have yet to tell you about the stuffed pork fillet and the clafoutis, but those are for another day.
Jam making is one of those things that has been looming over me and making me feel like a culinary fraud – how can I be a “proper” foodie if I haven’t made my own jam? So when our fridge was beginning to reach bursting point with all the cherry plums during the summer and I needed to use up lots of them in a hurry, I decided to grasp the nettle and try making some jam.


The mechanics of jam making are pretty simple: you boil up some fruit, a little water, some pectin and a lot of sugar and keep it boiling at a constant high temperature for 15 minutes or so until it starts to thicken. Then you can strain and bottle it, or bottle it without straining. One of the things that had always worried me about jam-making was where I’d find pectin, but I was heartened to learn that mirabelles are naturally high in pectin and therefore perfectly suited to jam. Another problem that had always put me off was sterilizing the jars – I was quite sure that it would be fiddly and complicated, or that I’d do it wrong and give everyone a dose of e-coli bacteria!! If this is how you feel too, let me give you some reassurance – say after me: sterilizing glass jars is really, really easy!
Here’s how to sterilize your glass jars:
Wash the jars and lids in hot, soapy water. Place the damp jars upside down in a cold oven and turn it to 160C (NB – start the jars in a cold oven – if you put the jars into a hot oven they may crack and break). Once the oven has heated up to 160C the jars are ready to be used – turn off the oven but leave the jars where they are. In the meantime, place the lids in a small saucepan of water and bring to the boil. Boil for 5 minutes, after which the lids are ready to use.
As for the recipe, I turned to that most excellent resource for all things English countryside-related, The Cottage Smallholder – they had two wild plum jam recipes, one of which I adapted for my jam. I figured that the plums and the sugar would make the jam fairly sweet, so I needed something spicier to counterbalance the sweetness – and what better candidate can there be for a spicy fruit jam than ginger?
The process was a lot simpler than I imagined – everything worked like it was supposed to and I got the mixture to 220F without any effort at all. I would suggest investing in a sugar/candy thermometer if you are going to venture into jam-making as it takes the guesswork out of the boiling stage, particularly if (like me) you have no idea what the mixture is supposed to look like! As you see from my two pictures, once the mixture has reached a rolling boil at the correct temperature, it will foam up right to the rim of the pot. Keep a close eye on it because allowing it to boil over will be incredibly messy.
The end result was (give or take a minute or two of, ahem, overcooking…!) astonishingly good. The consistency and colour were wonderful, and the flavour was fantastic – sweet, yet tart, and with a subtle hint of ginger, rather than an overwhelming wave of the stuff. I managed to leave the kitchen at the crucial moment to open the front door and came back to find a distinctly caramelly smell in the kitchen… The jam didn’t quite catch, but it was close enough to impart a slight caramel flavour – entirely my fault and not advisable, but not the end of the world either as I still love the finished product. Still, take it as a cautionary tale!
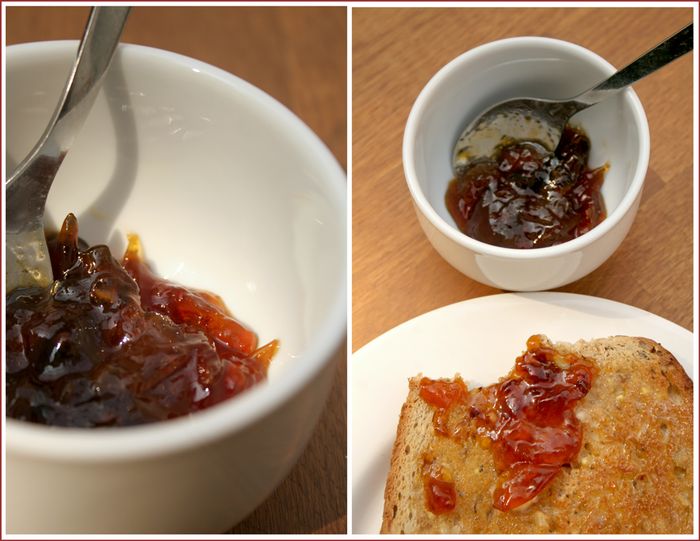
I am submitting this recipe to my friend Meeta of What’s for Lunch, Honey? for her Monthly Mingle event. The theme this month is brunch – and what brunch would be complete without some crispy toast, good butter and home-made jam? I will also be meeting Meeta in person for the first time later this month when we are both speaking at Food Blogger Connect, the first UK food blogger conference. Hope to see loads of you there!
CHERRY PLUM (MIRABELLE) AND GINGER JAM
Ingredients
1kg ripe cherry plums (you can substitute ordinary plums too but may need to add pectin)
1 kg granulated sugar
300ml water
2 tsp grated fresh ginger
Method:
Wash the plums in a colander and discard any that are damaged. Don’t worry about bruises – if you use windfall plums, most of them will have some bruising!
Place the washed plums and the water into a large, deep saucepan and simmer gently until the plum skins start to split. Use a slotted spoon to remove the stones.
Add the sugar and ginger and stir gently over low heat until you are certain that all the sugar crystals have dissolved. If you are a novice like me, clip a candy thermometer to the side of your pan, with the probe sticking into the fruit mix.
Turn up the heat to high and bring the mixture to a rolling boil – if you are wondering what a rolling boil looks like, see the picture on the right. You will see only fine, frothy bubbles, no liquid, and the bubbles will rise terrifyingly close to the rim of the pot 🙂 The temperature you should be aiming for on your candy thermometer is a steady 215F.
Allow to boil like this for 10 minutes, stirring frequently. After 10 minutes, you can start testing whether the jam has reached setting point. One of the methods I’ve seen used all over the net is the “cold plate” method. When you start making the jam, put a small plate in the fridge to chill. When you start testing, drizzle a small amount of the mix onto the cold plate and return to the fridge for a couple of minutes. If you then tilt the plate and the mix runs like liquid, the jam is not ready – continue boiling for another 5 minutes and test again. The jam is ready when, upon tilting the plate, the jam oozes rather than runs and a finger drawn lightly across the surface of the test sample leaves a crinkly track (in other words, the surface has set). Remove from the heat.
Carefully remove the hot jars from the oven and fill each with jam – do not let them cool, otherwise the heat from the jam will crack them. Be very careful when pouring as the jam will be very hot and can burn you! Screw the lids tightly onto the filled jars – you will need a cloth or oven glove to hold the hot jars. As the jam starts to cool, the lid should be sucked down into the sealed position (if your lids have the little pop-up seal indicator). Remember to label the jars with the contents and date when cool and store in a cool, dark place. If you have sterilised your jars properly, the jam can last for months – even years.